Manual for installing your Zebra label printer on a Mac

  • , by Danny
  • 1 min reading time
gk420 mac

In this blog, you will find a guide that can be used to install a Zebra printer on Mac OS X 10.5 and later. The CUPS driver that comes standard on the Mac is compatible with a Zebra ZPL printer, but the Zebra support department cannot assist with installation and configuration. With this guide, we will get you started... having trouble? Call, chat, or email us and we will help you further!

This instruction was performed on a Mac with OS X 10.5 and is shown for example purposes only:


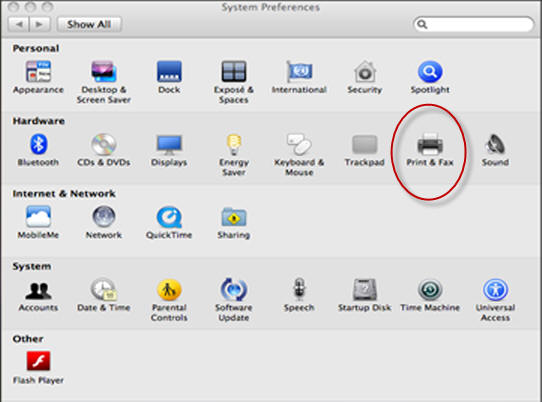
1. Go to System Preferences and then Print & Fax


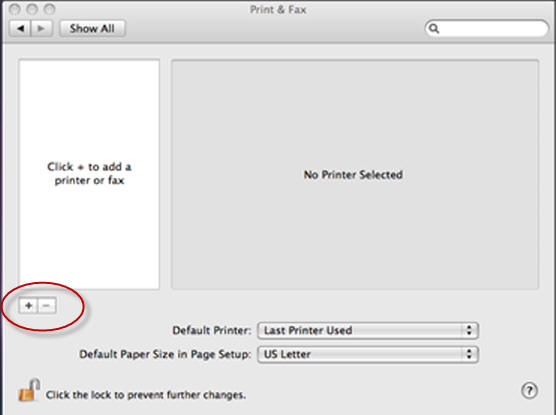
2. Click (+) to add the printer


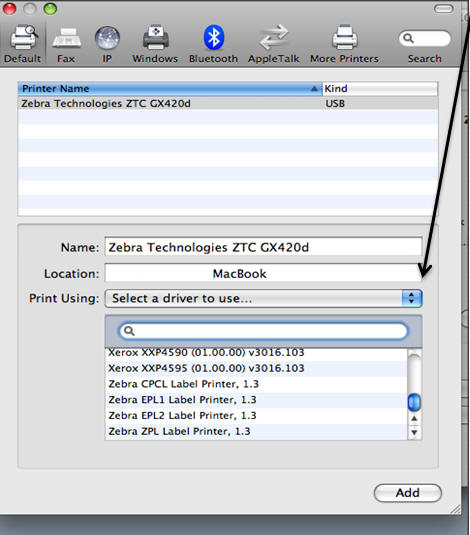
3. Available printers will appear. Select Zebra printer.


4. Now select the dropdown list to select a driver. You have 4 Zebra options to choose from. Select Zebra ZPL unless the printer indicates otherwise


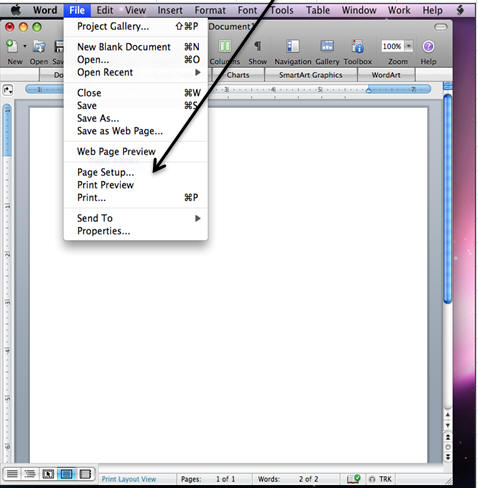
5. Open Word and then select File and Page Setup


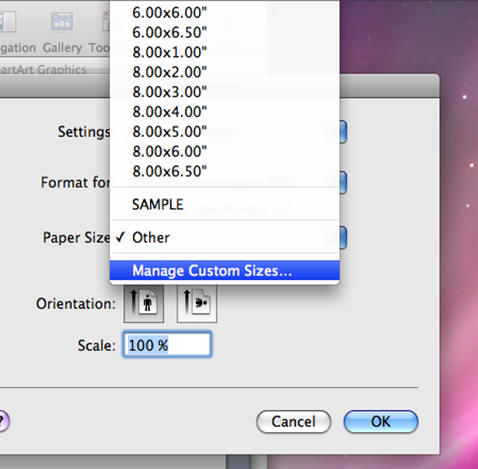
6. On the Page Setup page, change Format For to the Zebra printer and select the Paper Size dropdown list. You may also want to select your orientation for your layout.


7. Select Manage Custom Sizes.


8. Click the (+) to add a Name to the custom size. I used Sample and a 4x6 label. For printer margins, select your printer and for borders, make them all zero. Then click OK.


9. Word will show you the paper size you created. Now I tested a Test Print. Go to File, Print.


10. You have set up your printer on the Mac and successfully printed a test print.

 
Configuring the printer:

The following examples are all based on the 1.4.2 version of the CUPS driver, which requires the installation of the Snow Leopard MAC OS.
Use Safari for MAC to enter http://localhost:631/ or 127.0.0.1:631/ to access the CUPS driver. i.e., on the MAC OS the driver is built-in
Configure printer settings Read more >>
Print a test page with CUPS Read more >>
Print to file Read more >>


Tags

Recent articles

Login

Forgot your password?

Don't have an account yet?
Create account