
ZEBRA MANUAL FOR MAC
This instruction was performed on a Mac running OS X 10.5 and is shown for example purposes only:
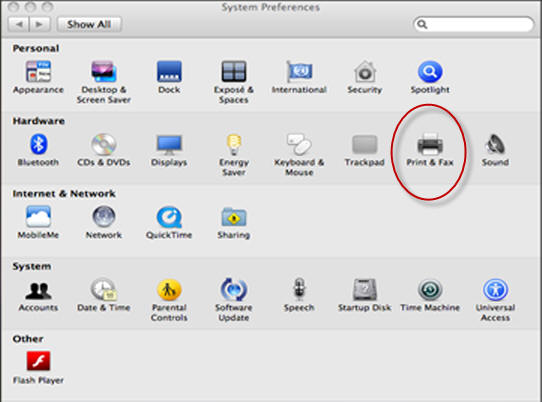
1. Go to System Preferences and then Print & Fax
2. Click on (+) to add the printer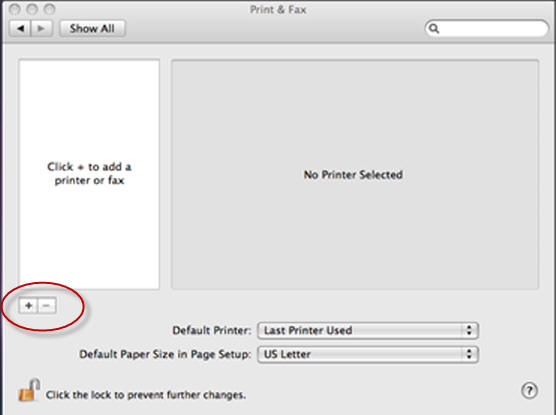
3. Available printers will appear. Select Zebra printer.
4. Now select the drop-down menu to select a driver. You have 4 Zebra options to choose from. Select Zebra ZPL unless the printer indicates otherwise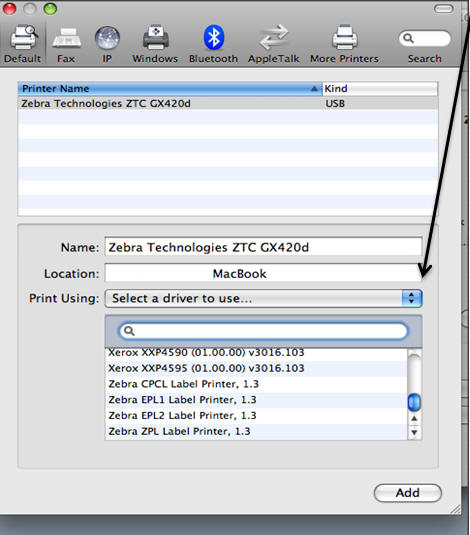
5. Open Word and then select File and Page Setup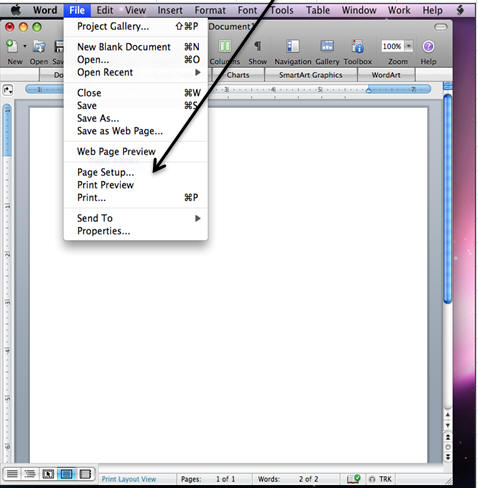
6. On the Page Setup page, change Format For to the Zebra printer and select the Paper Size drop-down menu. You may also want to select your orientation for your layout.
7. Select Manage Custom Sizes.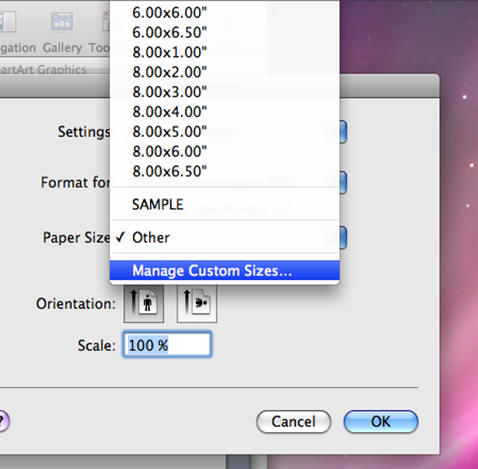
8. Click on the (+) to add a Name to the custom size. I used Sample and a 4x6 label. For printer margins, select your printer and for borders, make them all zero. Then click OK.
9. Word will show you the paper size you created. Now I tested a Test Print. Go to File, Print.
10. You have set up your printer on the Mac and successfully printed a test print.
The following examples are all based on the 1.4.2 version of the CUPS driver, which requires the installation of the Snow Leopard MAC OS. Use Safari for MAC to enter http://localhost:631/ or 127.0.0.1:631/ to access the CUPS driver. i.e., on the MAC OS, the driver is built-in. Configure printer settings Read more >> Printing a test page with CUPS Read more >> Printing to file Read more >>